Free SSH Remote IoT On Mac: Your Ultimate Guide!
Are you curious about seamlessly integrating your Mac with the dynamic world of Internet of Things (IoT) devices and remote access? Unlocking the potential of SSH (Secure Shell) for remote IoT access on your Mac, absolutely free, is not just possible; it's a gateway to unparalleled control and efficiency. If you're navigating the realms of remote access, delving into the intricacies of IoT devices, or specifically seeking Mac compatibility, then you've stumbled upon the right place.
Using SSH for remote IoT management, particularly on a Mac, has rapidly evolved from a niche technique to a cornerstone for developers, hobbyists, and IT professionals. The capacity to securely control and monitor devices from any location has become indispensable, particularly in an era dominated by remote work and geographically dispersed teams. This guide promises to be your compass in navigating the nuances of this technology, offering a comprehensive overview from initial setup to advanced configuration.
For many, the initial hurdle lies in understanding the fundamentals. What exactly is SSH, and how does it facilitate this magic? In essence, SSH is a cryptographic network protocol that provides a secure channel over an unsecured network. It establishes a secure connection, ensuring all data transmitted is encrypted, shielding your commands and data from prying eyes. The beauty of this is that it's freely available through OpenSSH, a widely-used, open-source implementation.
Before we dive into the practical aspects, let's clarify some key concepts. Remote access to IoT devices doesn't just mean peering into their workings from afar. It also implies a range of functionalities, including:
- Secure Command Execution: Running commands on your IoT devices as if you were physically present.
- File Transfer: Uploading and downloading files to and from your devices.
- Device Monitoring: Keeping an eye on the health and performance of your devices.
- Troubleshooting: Diagnosing and fixing issues remotely.
The ability to do all this for free adds another layer of allure. No licensing fees, no recurring costs just a straightforward setup that empowers you to control your devices without burning a hole in your pocket. But how does one begin? This guide will illuminate every step, from configuring SSH on your Mac to securely connecting with your IoT devices. We will also touch upon some additional considerations, such as the use of VPNs, which can provide an extra layer of security, particularly in professional settings.
Here's a glimpse into the exciting things we'll cover:
- Setting up SSH on your Mac.
- Connecting to IoT devices via SSH.
- Troubleshooting common problems.
- Exploring advanced configurations.
Now, the question isn't whether you can connect; it's how quickly can you set it up? Let's begin.
| Feature | Details |
|---|---|
| Concept | Remote IoT Access with SSH on Mac |
| Goal | Securely manage IoT devices from anywhere using a Mac |
| Technology Used | SSH, OpenSSH, Terminal, IoT Devices, Mac OS |
| Cost | Free (Open Source Software) |
| Benefits | Secure, Flexible, Free, Remote Device Management, Data encryption |
| Suitable For | Developers, Hobbyists, IT Professionals, Tech Enthusiasts, Businesses with IoT infrastructure |
| Key Considerations | Security, Network Configuration, Device Compatibility |
| Reference | OpenSSH Official Website |
The journey starts with your Mac. Luckily, macOS comes with SSH already built-in. You won't need to download additional software in most cases. This built-in feature, enabled via the Terminal app, streamlines the process, meaning you can connect to your devices immediately.
However, before you begin, it's crucial to understand the fundamental security principles underlying SSH. The protocol uses strong encryption to protect your data in transit. However, the level of security is highly dependent on your configuration. Strong passwords or, ideally, key-based authentication is a must. It's also good practice to regularly update your Mac's operating system and any SSH-related software to patch any security vulnerabilities.
The first step is to enable SSH access on your Mac. This is often a default setting, but it's always worth a double-check. Head to System Preferences, then click "Sharing". Make sure "Remote Login" is checked. You might also want to configure the options under "Allowed access for" to select which users can log in remotely. Consider creating a dedicated user account for remote access for enhanced security.
With the basic setup complete, it is now time to venture into the practical aspect of connecting to your IoT devices.
Connecting to IoT devices via SSH is a straightforward process, assuming your devices have SSH enabled and that you know their IP addresses. The basic command format youll use in the Terminal is:
ssh [username]@[IP address of your IoT device]
Replace [username] with the username you're using on your IoT device, and [IP address of your IoT device] with its actual IP address. You'll be prompted for your password (if you haven't set up key-based authentication, which is highly recommended). If everything is configured correctly, you'll be logged into your IoT device's command-line interface, and can then execute commands as though you were there.
Heres a step-by-step guide to help you through it:
- Identify your IoT Device's IP Address: Youll need to find your IoT device's local IP address. This can usually be found on the device itself, in the device's management interface (if it has one), or by checking your router's connected devices list.
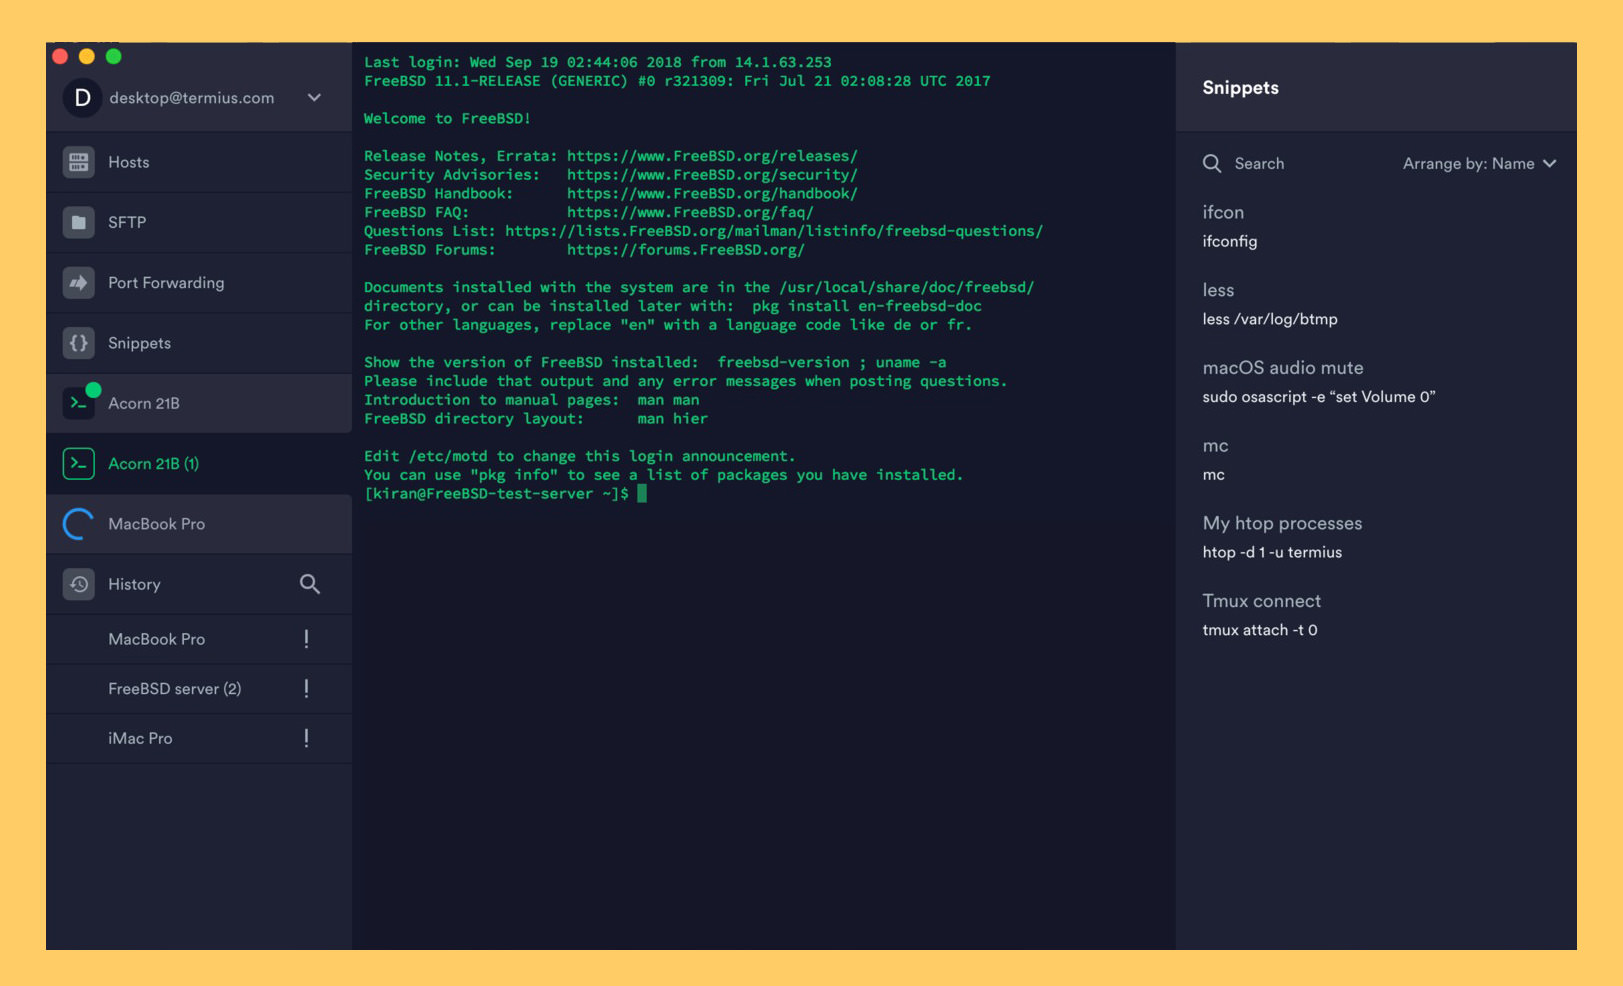
- Open the Terminal on your Mac: The Terminal is your window to the command line. You can find it in Applications > Utilities.
- Use the SSH Command: Type the SSH command, as described above, into the Terminal. For example:
ssh pi@192.168.1.100(where 'pi' is the username and 192.168.1.100 is the IP address). - Enter Your Password: You'll be prompted for the password associated with the username on your IoT device. Type it carefully and press Enter. (Note: For security reasons, you wont see the characters as you type.)
- You're In!: If the connection is successful, you'll see a command prompt for your IoT device, and you're now ready to issue commands.
This basic setup is your first step, but it's just the tip of the iceberg. You can enhance security and streamline the process with some advanced configurations, which we'll look at later.
The ease and power of SSH become especially clear when you realize you're not just limited to simple commands. You can transfer files, securely tunnel other applications, and troubleshoot remotely. For instance, if you're using a Raspberry Pi as an IoT hub, you could copy log files back to your Mac, update software, or even restart the device, all from the comfort of your couch.
Now let's delve deeper into security, as well as how to make this process more reliable and efficient. One of the most critical things to do for the security of your remote access setup is to secure SSH keys. SSH key-based authentication is far more secure than password authentication because it eliminates the possibility of brute-force attacks on your passwords. By using a pair of cryptographic keys (a public key and a private key), you can authorize access without ever entering a password.
To generate SSH keys on your Mac, use the following command in the Terminal:
ssh-keygen -t rsa -b 4096
Follow the prompts. You'll typically be asked where to save the keys and if you want to set a passphrase (which is highly recommended for your private key). Once the keys are generated, you will need to copy your public key to the authorized_keys file on your IoT device. The exact method depends on the device, but it usually involves using the ssh-copy-id command or manually copying the public key to the appropriate location. Once this is complete, you should be able to log in without a password (if you have set the passphrase). Note that even though you dont need to enter the password, you still need the passphrase for your private key during the initial access to your device.
Here are some tips to harden your SSH setup:
- Disable Password Authentication: Once you've configured key-based authentication, disable password login in your SSH configuration file (
/etc/ssh/sshd_config). SetPasswordAuthentication no. - Change the Default Port: SSH listens on port 22 by default. Changing this to a different port number can deter basic automated attacks.
- Limit User Access: Specify which users are allowed to connect via SSH. Use the
AllowUsersdirective in your SSH configuration file. - Firewall Configuration: Use a firewall on your Mac to restrict incoming SSH connections only from specific IP addresses or networks if possible.
While the standard SSH setup covers the basics, what happens when your IoT devices are behind a NAT (Network Address Translation) or firewall? In these scenarios, directly accessing your devices via SSH might prove to be a challenge. This is where port forwarding and other solutions come into play. Lets discuss this in depth.
Port forwarding allows you to access services running on devices behind a NAT or firewall. The fundamental principle is simple: configure your router or firewall to forward traffic from a specific port on your public IP address to a specific port on the internal IP address of your IoT device.
Here's how it works and the steps involved:
- Access Your Router's Configuration: Youll need to log into your router's web interface. This usually involves entering your router's IP address in a web browser (e.g., 192.168.1.1 or 192.168.0.1) and providing the username and password.
- Find the Port Forwarding Section: The exact location and terminology vary by router, but typically, it's under "Advanced Settings", "Firewall", or "NAT".
- Create a New Port Forwarding Rule:
- Service Name: Give the rule a descriptive name (e.g., "SSH to Raspberry Pi").
- Protocol: Select TCP.
- External Port: The port you want to use to access your device from the outside (e.g., 22, or a custom port like 2222).
- Internal Port: Usually, 22 (the default SSH port) for your IoT device.
- Internal IP Address: The local IP address of your IoT device.
- Save and Apply the Changes: Save your settings and reboot your router, if required.
- Connect from Outside Your Network: You should now be able to connect to your device from anywhere in the world by using your public IP address and the external port you configured (e.g.,
ssh pi@your_public_ip_address -p 2222).
Keep in mind that configuring port forwarding has some security implications. By opening a port on your router, you're potentially exposing your IoT device to the internet. Therefore, make sure you employ strong passwords or key-based authentication and keep your devices' software up-to-date.
If port forwarding isn't an option due to restrictions, there are alternative solutions, such as using reverse SSH tunnels or services such as ngrok, Qbee.io, and Pinggy. These tools create a secure tunnel from your IoT device back to a public server that you control. This allows you to access your device without having to configure port forwarding on your router, and these services provide additional security and features.
Let's examine some of these options in further detail:
- Reverse SSH Tunnels: These are a manual, yet very powerful, way to work around NAT and firewalls. You set up the SSH tunnel on your IoT device to the public server. From your Mac, you then connect to the public server, which redirects the traffic to your IoT device.
- ngrok: Ngrok is a very popular service that creates a secure tunnel to your localhost or network devices. With ngrok, you can expose local services behind NATs and firewalls without opening ports. It provides a public URL that forwards traffic to your local SSH server, offering ease of setup and is suitable for quick access.
- Qbee.io: This is a commercial service focused on secure remote access for IoT devices. It offers features like granular access control and centralized device management. Qbee.io makes the setup user-friendly, specifically catering to remote access of devices behind NAT and firewalls.
- Pinggy: Pinggy is similar to ngrok, it offers a free, easy-to-use method for creating tunnels. It allows you to share local ports and expose them to the internet without any configurations. With Pinggy, you can share SSH access and other network services over the internet quickly.
The choice of the best method depends on your specific needs and the security measures you want. While port forwarding is an option, it can introduce vulnerabilities if not configured correctly. Reverse SSH tunnels offer a more hands-on solution but demand a bit more technical expertise. Ngrok provides a simple, versatile solution, while Qbee.io and Pinggy offer robust features designed to secure and manage remote access to IoT devices. Remember to evaluate each services security practices, especially if handling sensitive data.
The integration of remote access with a platform like AWS (Amazon Web Services) VPC (Virtual Private Cloud), SSH, and a device like a Raspberry Pi, can transform a simple project into a robust, scalable IoT ecosystem. AWS VPC provides a private network within the AWS cloud, enabling secure connections. Coupling it with SSH enhances the secure management of devices, particularly Raspberry Pis. By configuring a VPC, you can set up private subnets, security groups, and access controls to isolate your IoT devices and restrict access. It is particularly useful for complex IoT deployments.
The benefit is a secure environment, which is critical for devices handling sensitive data, particularly those related to security, healthcare, or financial transactions. This means your devices are protected from unauthorized access, and communication between devices is encrypted.
Another aspect to consider is the use of a VNC server, particularly on a Raspberry Pi. A VNC server allows you to view and interact with the Pi's desktop from anywhere with an internet connection, offering a graphical user interface for managing your device. Tools like RealVNC are very common and reliable.
Heres how it works:
- Set up VNC Server: Install a VNC server on your Raspberry Pi. This usually involves running the appropriate package installation commands.
- Configure VNC: Configure the VNC server (e.g., set a password).
- Connect via SSH Tunnel: Create an SSH tunnel to forward the VNC port (usually 5900) from your Mac to your Raspberry Pi. The SSH tunnel encrypts all traffic, improving security.
- Use a VNC Client: Use a VNC client application on your Mac to connect to
localhost:5900. This allows you to view and control your Pis desktop remotely.
Using a web browser to control your IoT devices can be very effective, but it requires a remote IoT platform. These platforms provide a web interface to connect to and control your devices. They often support SSH for secure access. Many platforms also provide dashboards for real-time data visualization and analytics.
Here are some of the advantages:
- User-Friendly Interface: Web-based interfaces make it easy to manage devices from anywhere with a web browser.
- Scalability: These platforms are often designed to support a large number of devices.
- Data Visualization: They can provide real-time data visualization and analytics.
- Security: They typically offer secure authentication and access control.
Choosing the correct platform depends on your project's unique needs. Consider factors such as the number of devices, required security levels, and available features.
Troubleshooting problems with remote access to IoT devices can be challenging. If you encounter problems with your setup, start by verifying the basics. Check your internet connection, device's IP address, and SSH configurations. Here are a few common issues and their solutions:
- Connection Refused:
- Cause: The SSH server on your IoT device is not running, or there's a firewall blocking connections.
- Solution: Ensure SSH is enabled and running on your IoT device. Check your firewall rules on the device and your router.
- Authentication Errors:
- Cause: Incorrect username or password, or problems with SSH key authentication.
- Solution: Double-check your credentials. If using key-based authentication, verify your public key has been properly added to the
authorized_keysfile on the IoT device.
- Timeout Errors:
- Cause: Network issues, or the device is unreachable.
- Solution: Check your internet connection. Make sure the IoT device is powered on and connected to the network. Verify the device's IP address.
- Port Forwarding Issues:
- Cause: Incorrect port forwarding settings on your router.
- Solution: Double-check the external and internal ports, as well as the internal IP address of the device in your router's settings. Make sure the TCP protocol is selected.
Many of these errors can be debugged via the command line. Start with basic network checks (e.g., pinging your device's IP address). Check the SSH server's logs on the device to identify any errors. Remember to look up specific error messages in the documentation. A bit of persistence will typically get you through almost any issue.
As we have seen, SSH is a very versatile tool for remote access and management of IoT devices, but its important to recognize that it's not the only option. Virtual Network Computing (VNC) and Remote Desktop Protocol (RDP) also offer options for remote access. VNC provides a graphical interface and it is often used with Raspberry Pis, while RDP, commonly used for Windows environments, offers another level of control.
For example, VNC servers on a Raspberry Pi can provide a graphical user interface, enabling the user to interact with the device remotely. Similarly, RDP can provide a full-featured remote desktop experience, useful for tasks that need a graphical user interface. The choice between them depends on your specific requirements, the devices involved, and the level of control you need.
The deployment of remote access solutions depends greatly on the environments and device. In professional or industrial settings, where sensitive data is handled, or direct access to devices is required, the use of VPNs becomes increasingly important.
Heres how:
- IT Professionals VPN access to an IoT device on a remote network securely ensures secure communication between devices.
- Businesses and Tech Enthusiasts Remote access to IoT devices allows them to manage their infrastructure from anywhere in the world.
SSH provides a solid foundation, while tools such as VPNs, VNC, and remote IoT platforms provide additional features and security. They add enhanced functionality, but they do require a bit more time and resources to set up and manage.
The evolution of remote access technology is closely tied to the advances in IoT. We are now able to control our devices from anywhere, and this gives us a new level of efficiency. Remote work culture has also accelerated this trend, as teams distributed across geographical locations need to interact with their devices. Therefore, being able to download and set up the remote IoT platform SSH for secure remote access to devices is necessary.
Also, being able to securely access Linux or IoT devices quickly is a need for people who work in this field. This has become an important part of their daily routine. Using a device or phone to fix an issue securely from your couch is also an option, now.
Remote access to an IoT device has the ability to manage IoT from a remote computer or device. SSH, VNC, and RDP are a few of the techniques used.
Remote access to an IoT is useful for a variety of purposes, such as:
- Monitoring: Real-time monitoring of device status and performance.
- Control: Remote control of device functions and settings.
- Troubleshooting: Remote diagnostics and issue resolution.
- Maintenance: Remote software updates and system maintenance.
- Data Collection: Collecting data remotely from sensors and devices.
In this comprehensive guide, we have explored the landscape of remote access to IoT devices using SSH on your Mac. From understanding the fundamentals of SSH to setting up secure connections and troubleshooting common issues, you now possess the knowledge to manage your devices securely and efficiently. You know the importance of the different techniques to consider when building your system.
Armed with these tools and strategies, you're well-equipped to take control of your IoT devices, regardless of your location. The journey to remote control starts now!